Field descriptions Project Summary
This part describes the 4 tabs Visiting address, Task view, Calendar view and Resource Management.
 These buttons in the menu at the top of the
screen allow you to print a service order or send an e-mail to a
technician containing information regarding the project selected in the
task list.
These buttons in the menu at the top of the
screen allow you to print a service order or send an e-mail to a
technician containing information regarding the project selected in the
task list.
 This button gives you a list of the Sql
reports connected to this module. The reports are saved under
Reports->Sql Reports. If they are not accessible, you can download them
from our web site.
This button gives you a list of the Sql
reports connected to this module. The reports are saved under
Reports->Sql Reports. If they are not accessible, you can download them
from our web site.
 Resource search. button to open the resource
search so that you are able to limit the resource/technician list. The
search fields are resource name, team, competence, sortgroup 1-5,
department. If the button is not visible, the search window is open. To
close the search window, press the
Resource search. button to open the resource
search so that you are able to limit the resource/technician list. The
search fields are resource name, team, competence, sortgroup 1-5,
department. If the button is not visible, the search window is open. To
close the search window, press the  button.
 Button to see a log of all the movements
between the folders for the tasks. The administrator can decide if this
button should be available or not.
Button to see a log of all the movements
between the folders for the tasks. The administrator can decide if this
button should be available or not.
 This button gives you a list of other open
task on the selected customer. Only visible if there are any open task
for the selected customer.
This button gives you a list of other open
task on the selected customer. Only visible if there are any open task
for the selected customer.
Note! If you mark the double line, each user can maximize/minimize part of the screen dialog window (e.g. department, tree structure, task list).
Visiting address
The Visit address banner displays the active selected address for the chosen task.
| Address 1 | First line of selected customer address. |
| Address 2 | Second line of selected customer address. |
| Post Code | Area post code |
| Postal town or city | The town or city for the address. |
| Area code | The area the task belongs to. |
| Phone/fax number | telephone and fax number to the customer |
| Machine number | Machine number connected to the task. |
| Location | Physical location of the machine at customer site. |
At the bottom of the banner the task folder tree for the selected task will be displayed.
Task view
The tree structure displays the structure of the folders containing all your tasks. This structure can be changed under Settings->Project -> Task tree
a.) Folders number:Behind each folder is a number in brackets. This number indicates how many tasks are contained in the folder. By pointing with the mouse on the desired folder the task list will only display the tasks within the selected folder.
The folder at the top of the tree structure has a special significance and will normally be called “All”. This folder displays all the tasks within all the other folders in the tree structure plus all tasks that have not been placed in a folder.

b.) Show all: Below the folder tree you can select the <Show all> field. When this field has been selected the task list will display all the tasks within the selected folder plus all the folders below this one in the tree structure. NB! When selected, the folder at the top of the folder tree structure will always display all the tasks within the underlying tree structure. Therefore there is no need to select the Show All field when the top folder is selected.
At the bottom of the tree the system automatically add folders for the event statuses “Returned” and “Rejected”. The folders will show the number of tasks where at least one assignment has the status. Beneath the status folder you will see all folders that has at least one task with the status and if you click this folder the system will show the tasks with assignments of this status in the task list. The system will only show folders that has a task with the status
Calendar view
The technician calendar displays information regarding the technician's tasks. The calendar will always display information about the technician selected in the drop down list box at the top of the screen and not the technician selected in the technician list in the bottom right hand corner of the screen dialog.
To get the most out of the calendar it is best to assign tasks to the technicians from within the calendar. To do this see: How to assign technicians to a task.
The calendar will also display information regarding sick leave or holidays for the technician. It is also possible to add, open or delete activities direct in the calender. See: Technician schedule). Service Projects can be opened by double click or by right click and select form the menu.
Note! Your administrator can decide the contents of the activities in the calendar. This is created by using bookmarks (see Settings/COMPANY_XXX/PROJECT/ TECH_CALENDAR_PLANNED_TASK_TEXT and TECH_CALENDAR_FINISHED_TASK_TEXT ). It is also possible to see the start/stop times created by the technician using mobile (regarding open service projects) (See COMPANY_XXX\ PROJECT \ TECHNICIAN_START_STOP_W_COLOR COMPANY_XXX \ PROJECT \ TECHNICIAN_START_STOP_T_COLOR)
| Days | The calendar displays each day separately |
| Week | The calendar displays each week separately |
| All | By selecting "All" a calendar displaying all the technicians for the selected day will be shown. |
| Resource drop down list box | Select the technician to be viewed here. |
| Calendar | Displays assigned tasks and availability for the selected technician. Tasks assigned to the technician outside the calendar (See: How to assign technicians to a task) will not be displayed in the calendar when the time for the task has not been entered. The calendar will also show completed tasks and orders if the point of time for these has been entered. |
To the right you can select the day or week to be displayed in the calendar.
- Days that the technician has no assigned tasks will be displayed in grey.
- Days that the technician has very few assigned tasks will be displayed in green.
- Days that the technician has several assigned tasks will be displayed in yellow.
- Days that the technician has many assigned tasks will be displayed in red.
Sick leave, holidays and other reasons for a technician’s unavailability are also described as assigned tasks within the calendar. A print button is found under the calendar allowing the printing of the activities for the chosen day or week.
Task details
In (Summary>Project structure) details regarding the task selected from the task list are displayed. These details will not be available if you have selected the Resource calendar banner.
| Project/task number | Project number and task number. |
| Customer name | Name of the customer on the task |
| Contact | Customer contact |
| Symptom codes | Symptom codes for the error at the customer site. |
| Symptom text | Description of the error at the customer site in text format. |
| Checked out | Indicates if at least one of the assignments on this task is Accepted |
| Last event | Shows information about the last status added for any of the assignments on this task |
 |
Open history to see all assignment events for this task |
Department
A list containing all the departments within the company. The contents of the task list and the project structure will mirror the department selected from this list. When you open the dialog the department your user is connected to will be active. The Evatic administrator must be contacted to change this. Read more here.
Task List
The task list displays one line for each available task. For how to control which tasks are available see How to "control” the task list. You can decide upon the sequence in which the columns are to be displayed. You simply drag and drop the column titles into the required position. The width of the columns can also be adjusted. The system will store your changes and display in the same way whenever you use the task list, until you make other changes. If there are columns you don’t wish to use, drag them to the right of the list and they will no longer be displayed. Important columns can be moved to the left so it is easier to see them. If you want to sort the list differently simply click on the heading of the column you want to sort upon.
Each line in the list can be given a different colour. The colours and what they signify can be set up in Settings->Project->Priority. If this function is not available to you, contact the Evatic administrator.
Summary of the available columns:
Received |
The date the task was received. |
Customer |
The name of the customer |
Model |
The model type of the machine, if a machine is connected to the task. |
Post code |
The customers post code. |
Priority |
The priority of the task. |
Area |
The area in which the customer/machine is located. |
Response |
Point of time for task completion. |
Resource |
Which technicians the task has assigned. |
Contract type |
The type of contract the machine in the task is connected to. |
Postal description |
The town or city for the address. |
Colour |
This column does not display any information until you sort on it, (click on the column header) then the tasks will be sorted by colour. |
Project number |
The project the task belongs to. |
Task number |
The task number within the project. |
Machine |
The number of the machine connected to the task. |
Symptom 1 |
Symptom code 1 for the task |
Symptom 2 |
Symptom code 2 for the task |
Symptom 3 |
Symptom code 3 for the task |
Symptom text |
Symptom text for the task |
Action 1-3 |
Action code 1,2 and 3 for the task |
Action text |
Action text for the task (Note! See COMPANY_XXX \ PROJECT \ SHOW_SUMMARY_ACTION) |
Checked out |
Indicates if at least one of the assignments on this task is Accepted |
Contract type description |
Description of the type of contract for the machine/customer the task is connected to. |
Task status |
This field can be selected/changed directly in the list. Set up of the task status codes can be done in Settings ->Project->Task status. |
Address name |
The name of the visit address. |
Address 1 + 2 |
First and second line of the visit address. |
Postal code |
The postal code of the visit address. |
Postal description |
The postal description of the visit address. |
Solution time |
Point of date/time for task solution |
Planned time |
Will show agreed visit date if task is not assigned to technician. If assigned to technicians with a timeslot the first planned date will show. |
| Duration | Will show agreed duration if task is not assigned to technician. If assigned to technicians with a timeslot the duration in the timeslot will show. If assigned to several technicians the sum of all timeslots (durations) will show. |
P-Info 01 and 02 |
Info fields (COMPANY_XXX /PROJECT_INFO / INFO_01..INFO_02) |
ID number |
Machine id number |
Customer no |
Customer number from task customer |
Menu (right click on a task in the task list)
Open task |
Open the marked task in the task list (or you can double click on the task) |
Assign task |
Assign the marked task (same as pressing F7) |
Add reminder |
Possibility to add reminder (calendar activity) linked to a project. These functions open the calendar activity window and give you a possibility to save an activity/reminder connected to the task. Subject/text etc. are suggested default from the project. (see Evatic Admin/ Company XXX/PROJECT/REMINDER_DEFAULT_SUBJECT) In the reminder window you can choose to open the project or open the activity. In the activity window a new "open button" gives you the possibility to open the project from this window. |
Undo check out |
Only for Evatic Mobile. Possible to set a task manually as undo check out. The task will then be removed from mobile and the dispatcher can e.g. assign the task to another technician. |
Limit view
The Limit view banner is used when there are too many tasks in the list and it is difficult to sort correctly and find the task you are looking for or using the Project Structure folder tree structure is not enough.
When the limit selection is on, a icon  will
appear around the text: Limit view.
will
appear around the text: Limit view.
A number in brackets after the folder Project structure will be displayed of how many tasks are in the list depending upon the limits of the selection made.
The limits will be automatically switched off if you use the technician list to see the tasks assigned to a chosen technician. (See Assigned Tasks or Competent Tasks).
Fields you can use to limit the selection(you can limit upon one or more fields simultaneously):
| Area from/to | Only tasks within this area |
| Post code from/to | Only tasks within this post code range |
| Received from/to | Only tasks received in this period |
| Responsdate from/to | Only task with responsdate in this period |
| Planned date from/to | Only task with planned date in this period |
| Model from/to | Only tasks within this model range |
| Contract type from/to | Only tasks within this contract type range |
| Priority from/to | Only tasks within this priority range |
| Symptom codes | Only task with the selected symptomcodes (1-3) |
| Project number | Only tasks with this project number |
| Technician number | Only tasks assigned to this technician |
Buttons:
| Show all tasks | Switch off limitations and show all tasks |
| Limit task list | Switch on limitations depending on the selections made in the limit fields. |
| Clear limitation | Remove information from the limit fields. |
Resources
This list displays all the technicians connected to the selected department.
Limit task list from technician
|
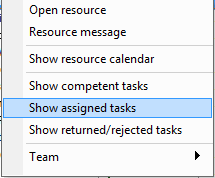
1. How to show assigned tasks: By double clicking on a technician the Task list will only display the tasks for the selected technician. The Assign field over the list will be displayed in red to signify that the list has been limited upon the selected technician. The same result can be achieved by right clicking on a technician and selecting <Show Assigned Tasks>.
Note! Your administrator can decide which folders should not be included here (Company XXX/PROJECT/ SUMMARY_TECH_TASKS_NOT_SHOW_NODE) |
|
When Evatic is in this mode the Assign field is displayed in red. |
|
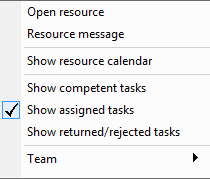
In the mouse right click menu a tick will be displayed in front of the <Show Assigned Tasks> You can then select between all the different technicians and see which tasks have been assigned, by simply clicking once with the mouse.
How to abolish the limitation: By clicking on the red field (Assign), or click once more on <Show Assigned Tasks> in right click mouse menu, you can remove the limitations in the Task list. The field will once again be displayed in grey and the Task list will display information independent of technician. |
|
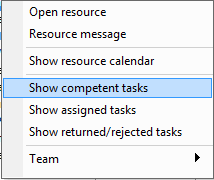
2. How to show competent tasks: By right clicking on a technician and selecting <Show Competent Tasks> the Task listonly displays tasks this technician is competent of completing.
|
|
The Assign over the list will then be displayed in yellow to signify that the list is limited to the selected technician. |
|
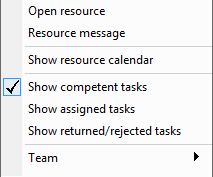
In the mouse right click menu a tick will be displayed in front of the <Show Competent Tasks>. You can then select between all the different technicians and see which tasks the different technicians are competent of completing, by simply clicking once with the mouse. How to abolish the limitation: By clicking on the yellow field (Assign), or click once more on <Show Competent Tasks> in right click mouse menu, you can remove the limitations in the Task list. The field will once again be displayed in grey and the Task list will display information independent of technician. |
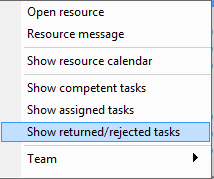 |
3. How to show Returned or rejected tasks By right clicking on a technician and selecting <Show returned/rejected tasks> the Task list only displays tasks where this technician as at least one assignment with the status rejected or returned. |
 |
Above the assign list you will then see that the list is in returned/rejected view. |
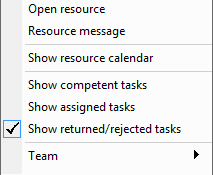 |
In the mouse right click menu a tick will be displayed in front of the <Show returned/rejected tasks>. You can then select between all the different technicians and see which tasks the different technicians have in this status by simply clicking once with the mouse. How to abolish the limitation: By clicking on the field above the list, or click once more on <Show returned/rejected tasks> in right click mouse menu, you can remove the limitations in the Task list. The field will once again be displayed in gray and the Task list will display information independent of technician. |


Resource message
You can here add a message to the technicians, as well as you can see the messages send from the technicians from there Evatic Mobile. If one technician has a message, the technician is marked red and with an arrow in front (under M = Message). Green arrow means message from dispatcher to technician, red arrow means message from technician to dispatcher.
|
How adding a message to a technician: By right clicking on a technician and selecting <Resource Message>, a new screen appears where you can add a message to the technician. How to delete a message to a technician: By right clicking on a technician and selecting <Resource Message>, a new screen appears where you can see the message to the technician. Press the Remember! The dialog box shown above the technician message box, shows messages which the technician sends to the dispatcher (Only for Evatic Mobile users.) |
|
The Assign over the list will then be displayed in green to signify that the list is limited to the selected technicians. |
|
In the mouse right click menu a tick will be displayed in front of the <Resource Message>. You can then select between all the different technicians and see which message the technicians have, by simply clicking once with the mouse.
How to abolish the limitation: By clicking on the yellow field (Assign), or click once more on <Resource Message> in right click mouse menu, you can remove the limitations. The field will once again be displayed in grey and the messages will not be displayed. |
Sms/Email
A proposal can be send to the technician per email/sms.
By right clicking on a technician and selecting <Send project SMS to resource> or <SMS to resource>, a pop up window will be displayed where you can create an email/sms. Read more here.
1. <Send project SMS to resource>: The SMS will be stores under the project (see Project/Events tab)
2. <Send SMS to resource>: This is a general SMS that has nothing to do with a special project (will not be stored).
Note! SMS's can be send to several technicians by marking several technicians (using SHIFT/CTRL key) and then right clicking and select <Send project SMS to resource> or <SMS to resource>.
Status (Evatic Mobile)
This column is only for Evatic Mobile users. It shows the status of the technician:
A = Available.
N = Not available.
T = Traveling.
W = Working.
Behind the status T and W will show the start time travel/work and name of the customer the technician is visiting. Also the last time the technician synced his data (e.g. new projects, articles etc) are shown with date and time.
Resource management
This function gives the user a possibility to view and plan the availability/tasks for many resources at the same time.
(If normal activities should be displayed in the resource calendar/management, this can be done by your administrator: Company XXX/PROJECT /RES_MAN_SHOW_ACTIVITIES)
| Date | Shows today’s date. Select from the drop-down list for an overview of previous tasks or upcoming tasks. |
| Slide (right-left) | Slide function where the user can choose the resolution of the calendar |
| Slide (up-down) | Slide function to choose how high each row should be |
| No.of days | How many days should the system get and show data? (5-31 days) |
| Always start on Monday | Mark if the calendar should start on Monday for the week of the selected date. |
| Responsdate in period | Mark if you only should see task which have a responstime in the date period set up in the resource management. |
| Planned date in period | Mark if you only should see task which have a planned date in the date period set up in the resource management. |
| Show non working hours day | Mark this as yes if you want to see the hours/days that not are work hours according to the calendar |
 |
Move focus in the calendar to currant day/time. |
 |
Button to extend the calendar view to the entire window |
On the left side of the view there is a list that shows each technician with number, name, availability from the mobile solution and the technicians timezone.
On the right side of the screen you can see the planned tasks for each technician.
You can drag a task from the task list to the view to assign and plan a task.
You can drag a task from the first row (unassigned planned tasks) to the row with the technician that you want to assign this task to.
You can drag& drop tasks in the view on the same row for the technician. If you hold the shift-button while dragging you will make a new planned time for the same technician (in addition to the existing timeslots). If you drag without shift button you will change the date/time for the selected time slot.
You can drag& drop planned task between technicians. You can copy the task to several technicians with holding down the shift button. If you drag the task to another technician without holding the shift button the system will ask you if you want to remove the other assigned technicians/timeslots
If you right click in the view you can:
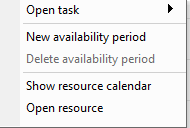
| Open task | Open the task in the project window (if you have a task selected) |
| New availability period | Add a new availability period for the technician |
| Delete availability period | Delete the selected availability period |
| Show resource calendar | Move to the calendar view with this technician selected |
| Open resource | Open the technician window for this technician |
Your administrator can decide if the start/stop status (from mobile) should be visible in the calendar for projects that are not completed (COMPANY_XXX\ Evatic Mobile \ SHOW_TECHNICIAN_START_STOP )
Technician search
The technician list can be limited by using the technician search.
Enter a name and press F3 (or Enter/Search button), or you can limit by competence group, sort group 1-5.
The technician search can also be used for searching for technicians from all departments, only available technicians and only competent technician for the marked task.
 |
Close the technician search screen |
 |
Open the technician search screen |