Document tree
If you have several document templates you can set up document tree to group all your documents.
How to set up the tree
|
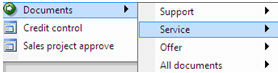
1. If you are starting with an empty screen, click with right mouse button to open this menu.
2. Select New Item.
|
|
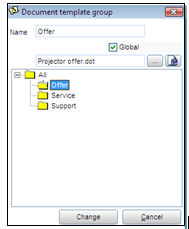
You will then see the box shown to the left.
3. Enter the name for the node at the top of the folder tree. Typically this might be called, ”All” or something similar.
4. Then press < Enter> on your keyboard. |
|
5. Click then with the right mouse button on the node you have just set up and select New Item from the menu displayed.
A new node below the first will be entered into the folder structure, as displayed below. Repeat the actions for the first node giving this node a relevant name and press <Enter> again.
Only possible to add 1 level. |
- Continue in this way until the tree structure is complete.
- Then press F12 to save the information.
See the example below:
How to group the documents
When entering a new document group (template), you can save the document in a node (see above) (the same is also when changing a document).
Note! The document can be found through Evatics menu:
E.g. My Evatic/Salesman tool: