Menu for tasks
By right clicking on a service task, the following menu will be displayed:
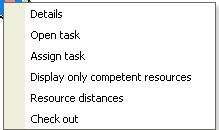
Details |
Shows a note on the map with the following information about the task: -Project number. To remove this detailed note, click somewhere else in the map. Note! One click on the service task will display the same information. |
Open task |
Opens the marked service task. |
Assign task |
By selecting this option , a new screen dialog opens (Assign to resource). Here you can assign the job to one or several technicians / the node where the job should be placed can also be selected (changed). |
Display only competent resources |
By selecting this option, it removes the technicians, who are not competent to work on the task. (To deactivate this options, go to project->summary and remove the cross on <Show only competent resources>) |
Resource distances |
By selecting this option, Evatic will calculate the driven kilometers and travel time for the technician. This is based on accessible roads and the speed limit on those roads (not beeline). Note that the travel time is the minimum travel time. The result is displayed on each technician. The nearest technician is marked green, the next one is marked yellow and the third nearest technician is marked purple. To close this option, click on <Display info on resource> in the toolbar. |
Check out |
This is the manual way to set a task as checked out. For the customers not using Evatic Mobile, this is the way to signalize that the technician has started to work on the task and the job disappears from the map. The technicians car is moved to the service jobs address (see Route planning). |
Note! Assigned jobs where the responds time has gone out, are marked
e.g. blue, showing the assigned colour. The inner circle marked e.g. red
shows the alarm colour. 