SQL reports and merging with rpx-files
This function merges the results of the selected SQL-report into a rpx file, so that the result is shown in a PDF format. You start with a blank or existing rpx file and uses the same fields as in the sql report. The values under property 'Datafield' must be the same as in the sql report.
1. Create an sql report. Use the field names (ARTICLE_NO, ARTICLE_DESCRIPTION) when setting up the rpx-file.
2. Start Evatic Admin/Report Designer
3. Start with a blank layout
4. Create the layout. Add for example a page/group header and call it ‘My article report’. In the detail section, add the text fields that you want to be displayed from the sql report. The data field property for each text field must be according to the field names in the sql-report. In this case, add two text fields and set the data field property to ‘ARTICLE_NO’ and ‘ARTICLE_DESCRIPTION’. (see Evatic Admin help).
5. Save the rpx-file by using the menu File->Save. Save the file to a folder on your hard drive.
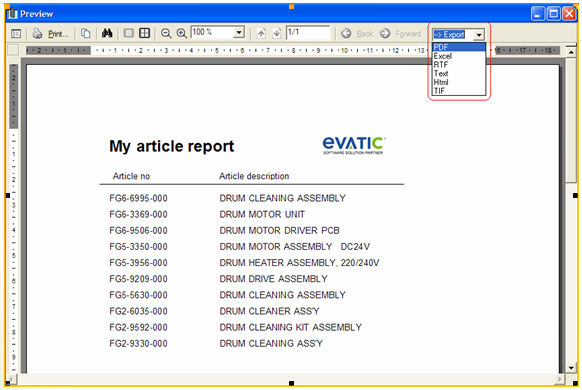
6. In Evatic Service, when creating the sql report, select ‘Use merging’ and then select the rpx-file that you have just created using the report designer.
7. When running the report, press the ‘Excel/merge’ button. The result of the report will then be shown and can be printed or exported (pdf.md/rtf/etc.):