User Manual for Evatic Customer Web
Introduction
This is a user manual for Evatic Customer Web (ECW). The steps for installing the solution and the use of the site are described in general terms. Please note that this manual is for the standard Evatic Customer Web and that customer specific solutions may not be covered.
Installation
The Installation guide can be found here.
Initial setup
The complete list of available settings is located at the end of this document. This tutorial will only go through the basics of setting up login credentials for users, and making articles available for ordering through ECW.
Set login credentials for contact persons
Please click on this link to read about how to create a new user for Evatic Customer Web.
Make articles available
To make articles available in ECW they must be added as ‘Quick order articles’ for the model. This is done in Evatic Service.
Look up the model:
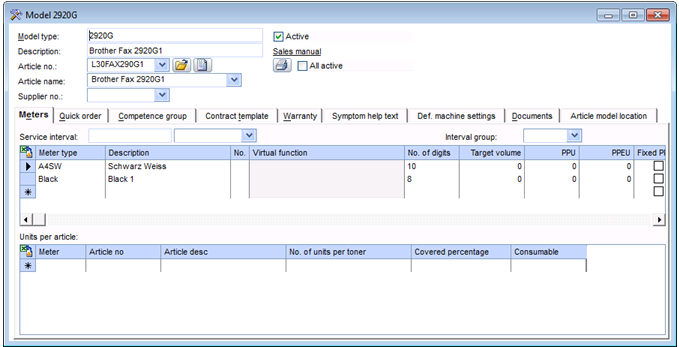
Click on the tab Quick order.
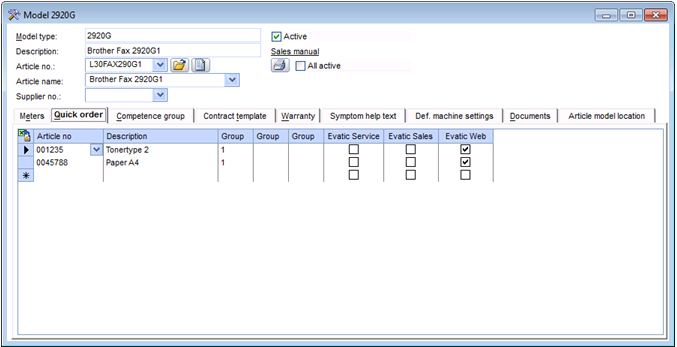
Articles added here and checked off for Evatic Web will be available in ECW.
If the machine is active on ECMM the consumables for this machine that is part of the ECMM contract will not be visible in the order window in ECW.
Using ECW
Please click on this link to read about how to login Evatic Customer Web for the first time.
See how to reset password for ECW v. 7
Order articles
New orders can be added by clicking Order in the menu.
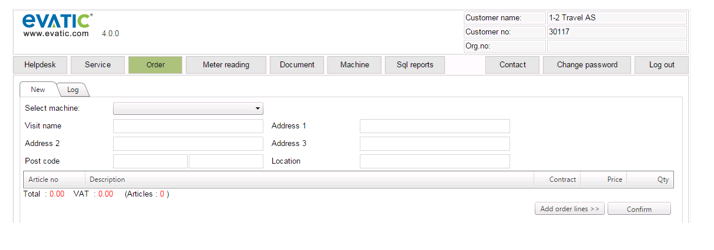
The customer must select a machine first.
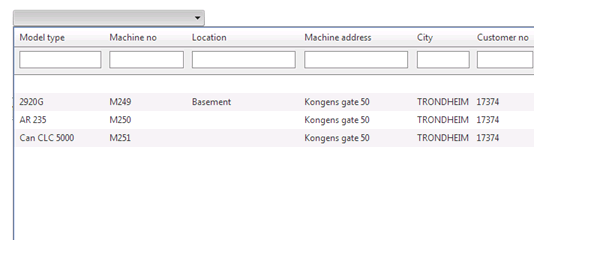
To easier find the right machine, the customer can do a search in any of the columns. By clicking the heading, the results is sorted by the selected column.

After selecting a machine, articles can be ordered. The articles available are limited by the articles added as Quick Order Articles for the model in Evatic Service.
If the machine is active on ECMM the consumables for this machine that is part of the ECMM contract will not be visible in the order window in ECW.
Simply type a quantity and click . In EAW you can add the maximum quantity the customer can order. The Contract-column indicates if the articles are included in the contract or not.
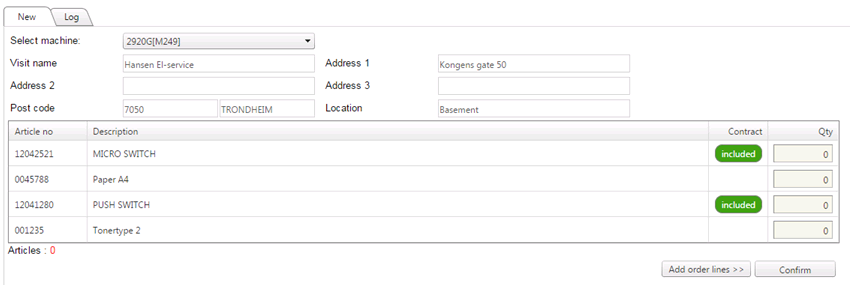
By clicking the articles are added to the order, and summarized like this:

Click when done entering articles.
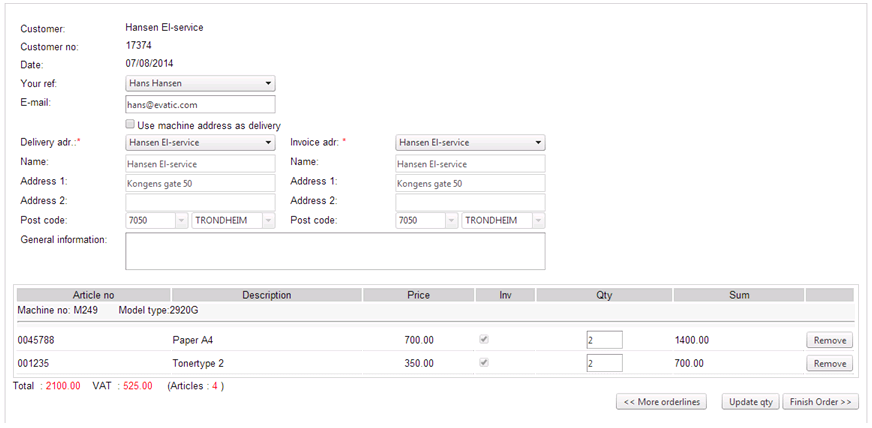
The order confirmation window allows the customer to change contact information, delivery and invoice address, as well as remove or make changes to the articles to be ordered. The customer default values are automatically selected. Mandatory fields are managed in EAW, and marked with *.
Click , and a confirmation will be shown when the order is registered.

Order log
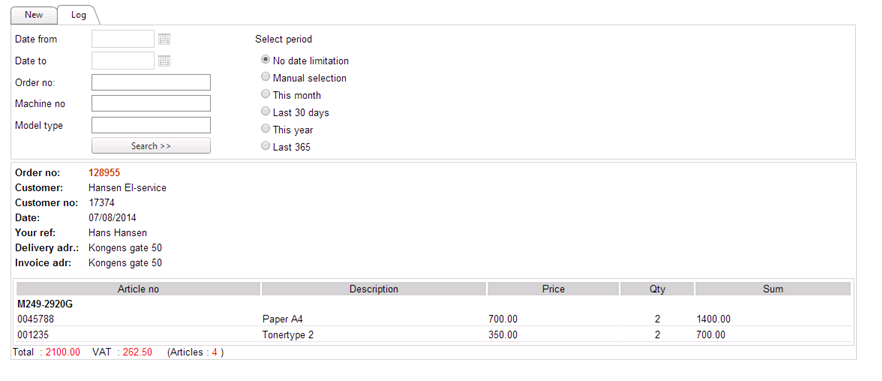
Previous orders are listed under the tab Log, with the option to filter by date, order number, machine and/or model.
Create a service project
Press the Service tab in the menu to create a new service project.
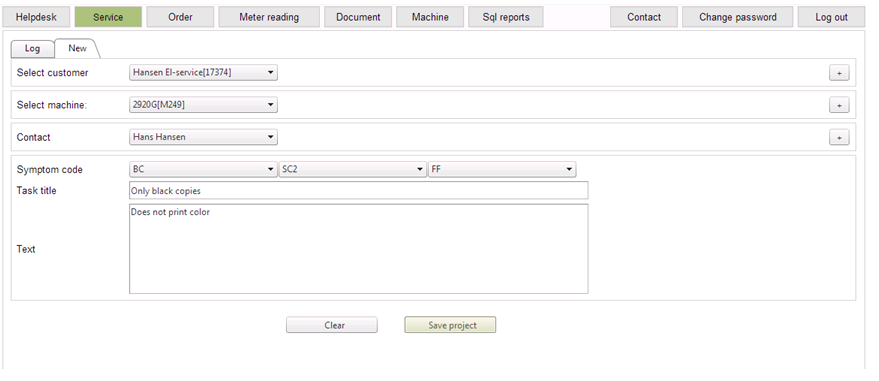
The customer selection drop-down is only displayed for customers using the Main Office functionality, allowing them to create and view orders for the customers they are a debtor for. This is controlled by a setting in EAW.
Select a machine, contact person and symptom code(s), and fill out subject and text. Selecting which symptom codes can be available is done trough settings in EAW.
Mandatory fields can be set in EAW.
By clicking  , the user is provided with more details about the selection, and given the ability to make corrections. Any changes made to the customer or machine contact info will apply only to the current project, and not the customer database.

However, if the user clicks on , changes will also apply to the Evatic database. A setting in EAW decides if this button is available or not.
Click to create the project.

Service log
Previous service projects can be found under the tab Log.
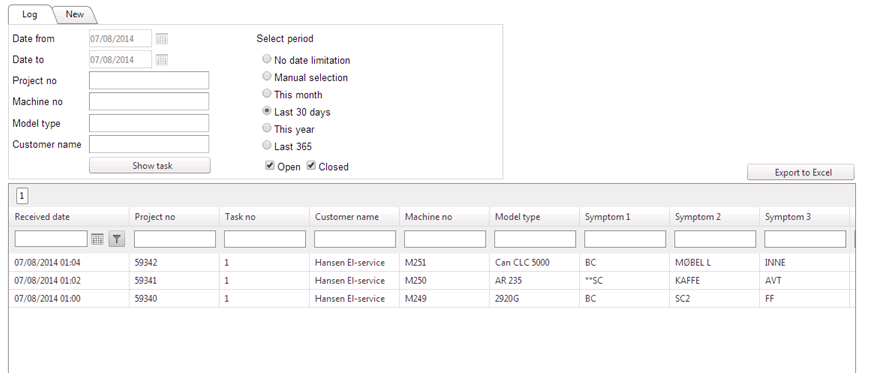
The user is provided with a list of all projects, and can filter on date, and search using various criteria. It is also possible to export this list to Excel, simply by pressing .
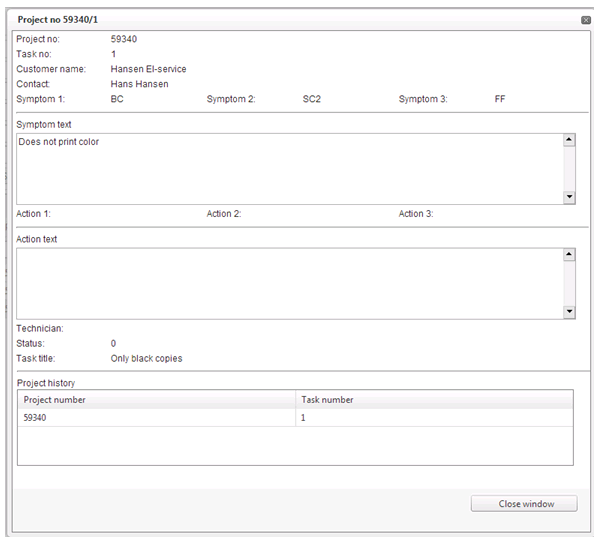
Double-click on one of the project lines to get detailed info about the project, including both the information provided by the user as well as work done on the project.
Create a HelpDesk task
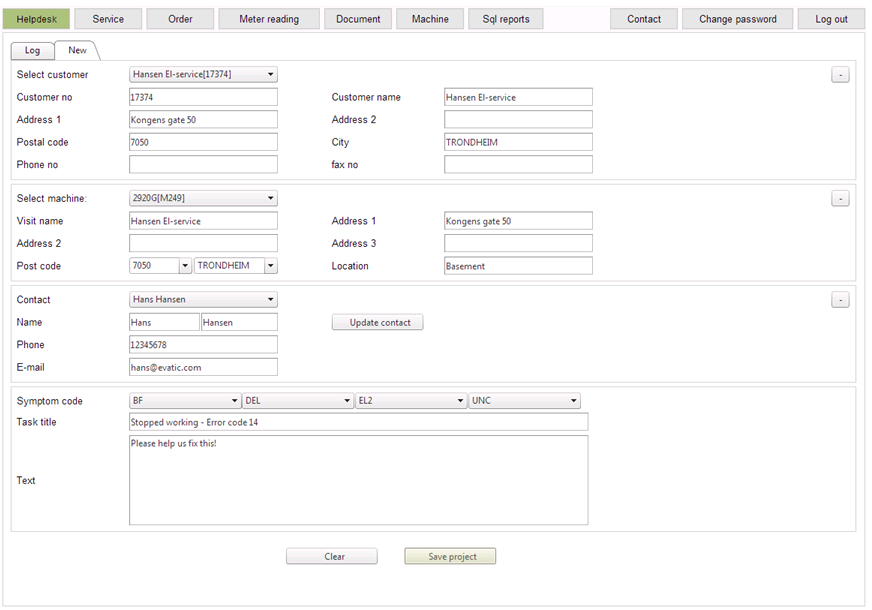
For the customer, creating a HelpDesk task is similar to creating a new service project. Select machine, and fill in the necessary information.
Click and the following confirmation is given:

Helpdesk log
The HelpDesk log is available under the tab Log. Information is presented similar to the way Service projects are.
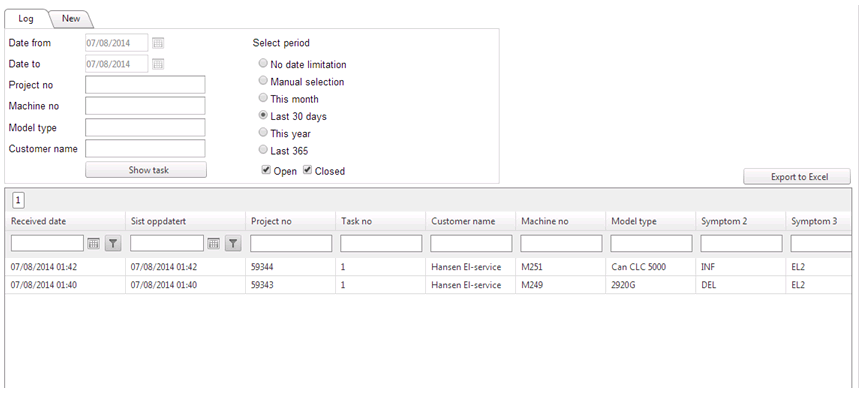
Double click on a task to see more information about the task.
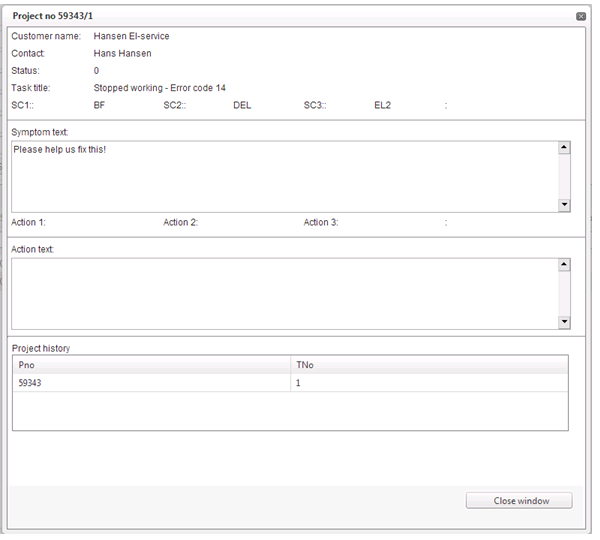
This information is presented just like Service projects, with detailed info about the project, including both the information provided by the user as well as work done on the project
Meter reading
With the release of Evatic Insider 23.04.2021, Meter Readings can be submitted via the ECW portal without a customer user login. See setup and use.
Standard logged in procedure:
Press the tab Meter reading to register meter readings.
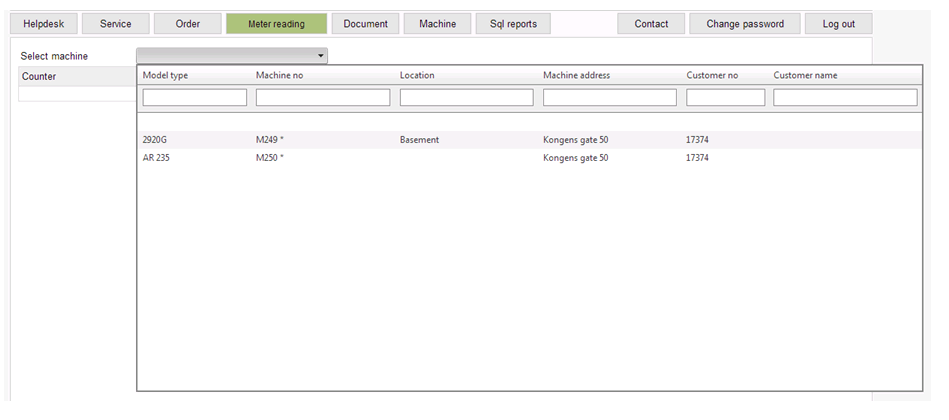
Select a machine to see the generated meter reading letters. Only machines with available meter reading letters will be shown. You can use the setting MAIL_RECEIPT_METER_READING to allow the sending of a confirmation mail.

Type the new meter value in the field New counter and press .

Accept the meter value by clicking . Click to go back and edit the counter.
The following confirmation is given:

Meter reading letters must be generated in Evatic Service, also for the customers using ECW.
Meter readings registered in ECW are treated like any other meter reading in Evatic Service. This means that the contract must be invoiced in Evatic Service after the customer has registered the meter reading.
Direct login
Meter Readings can be submitted via the ECW portal without a customer user login. See setup and use.
Edit machine info
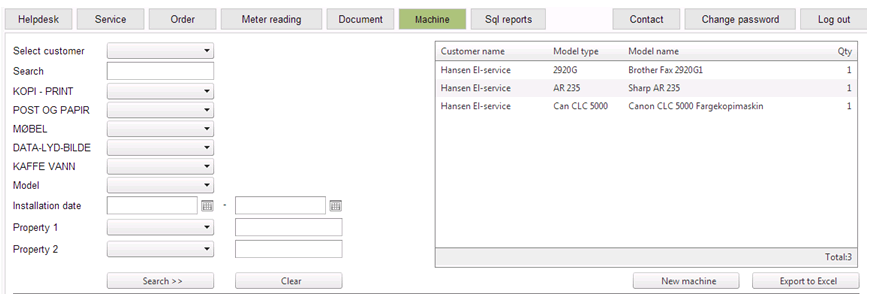
Press the Machine tab to list all machines registered on the customer, with the option to filter and search using various criteria.
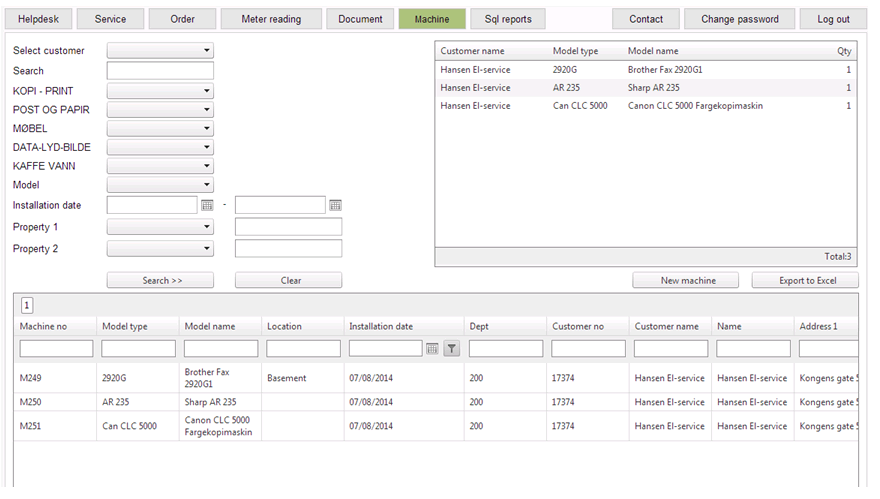
Double-click on a machine to view and edit information registered on the machines.
Access to the Machine tab is controlled in either Evatic Service (as shown above) or by granting access in ECW (as shown below).
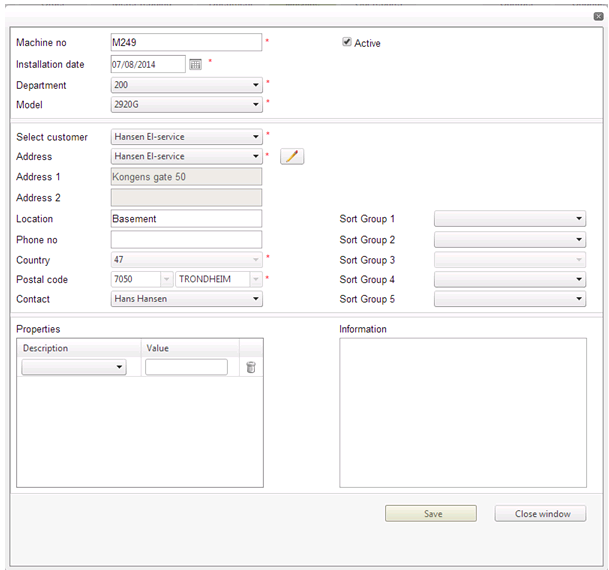
Edit or add information, and click to save the changes to the Evatic Database.
Add a machine
Under the Machine tab, click to add a machine
A window similar to the one for editing machine info opens up.
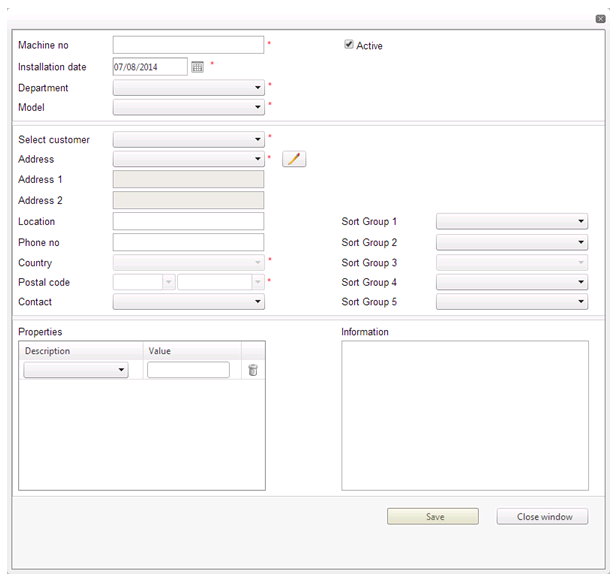
Fill in the required information and click .
Document
Press Document in the menu to get a list of the machines and the documents submitted along with service projects.
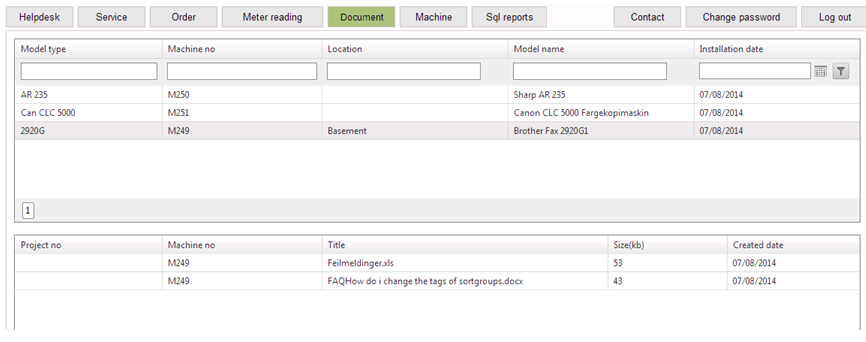
To save/open a document, simply double-click on the file.
SQL reports
To access SQL reports, the below settings in EAW must be changed:
Set COMPANY_XXX/Evatic Web/SHOW_MENU_REPORTS to 1
In COMPANY_XXX/Evatic Web/SQL_REPORTS_NODE insert a path from MyEvatic / Reports / SQL-Reports, for example 1_All_2_Standard_Article
Press the Sql reports tab to access and run reports from ECW.
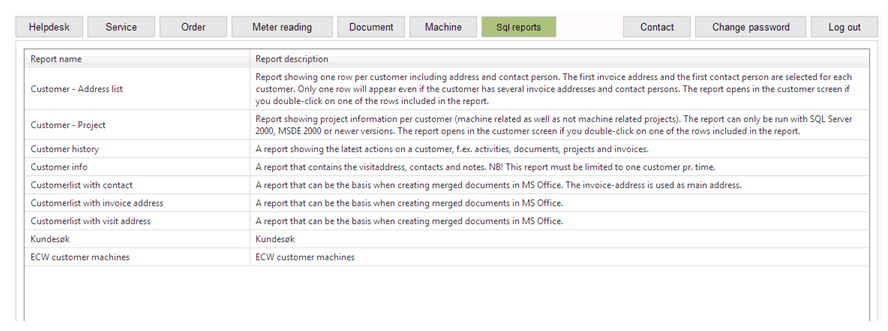
Double-click on the report to open the search window with the option to filter and search using various criteria.

Click to get the result.

In order to export the report to Excel, simply press .
Edit contact information
Contact persons with access to the Contact tab can add and edit the customer’s contact persons in ECW.
Click on the Contact tab to list all registered contact persons for the customer.

Double-click on a contact person to edit the information or access rights. The available access rights are controlled by settings in EAW.
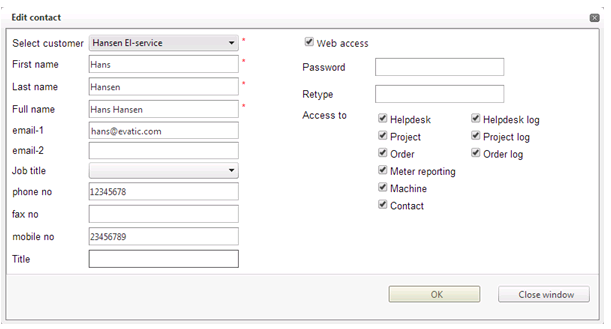
Click to save.
Add a new contact person by clicking.
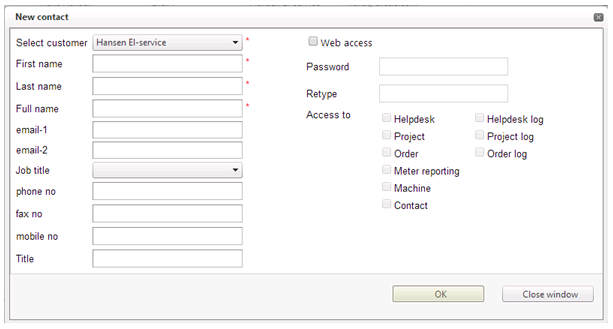
Enter the details about the contact and click to add.
Delete a contact person by selecting him or her in the list, and click .
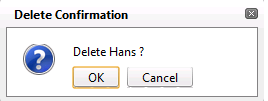
Click OK to delete.